
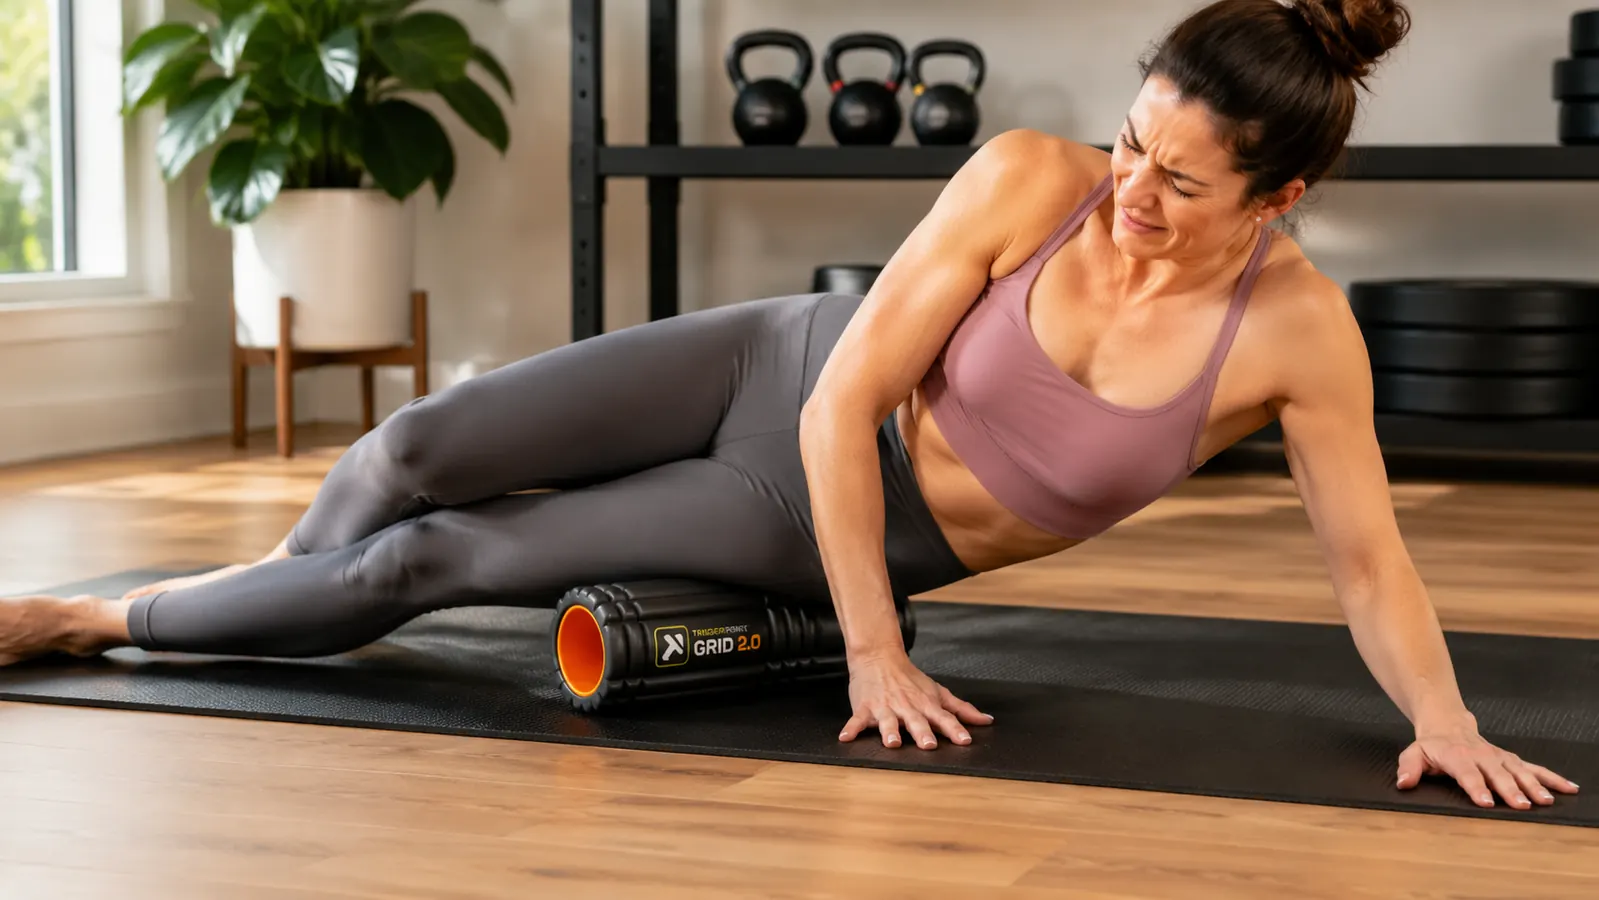
If your outer knee aches after runs, your hip feels locked up between squat sessions, or you walk stiffly for the first ten minutes after sitting for a while, tight IT band and hip flexor tissue is a common culprit. The frustrating part is that most foam rolling protocols make it worse, or at best do nothing, because they target the wrong structures. The IT band itself is a dense fibrous band, not a muscle. You cannot roll it into submission. But the muscles that feed into it, and the hip flexors that pull your pelvis out of position in the first place, absolutely respond to consistent, well-placed pressure. This protocol uses the TriggerPoint GRID 2.0 Foam Roller to work through five targeted positions that address the real sources of that lateral tightness and hip stiffness.
We've run this protocol with runners training for half marathons, lifters who spend too much time at a desk, and cyclists whose hips are chronically shortened from time in the saddle. The consistent finding: when you stop grinding on the IT band itself and start rolling the TFL (tensor fasciae latae), glutes, quads, and hip flexors, the outer knee and lateral hip discomfort eases noticeably. Here's the exact sequence, with timing and body positioning for each step.
The roller matters when you're targeting tight lateral hip tissue
The TriggerPoint GRID 2.0 has three surface densities built into its foam grid pattern, which lets you modulate pressure across different muscle thickness without switching tools. It's the roller we use throughout this protocol.
Amazon Check Today's Price on Amazon →Why Rolling the IT Band Directly Often Doesn't Help
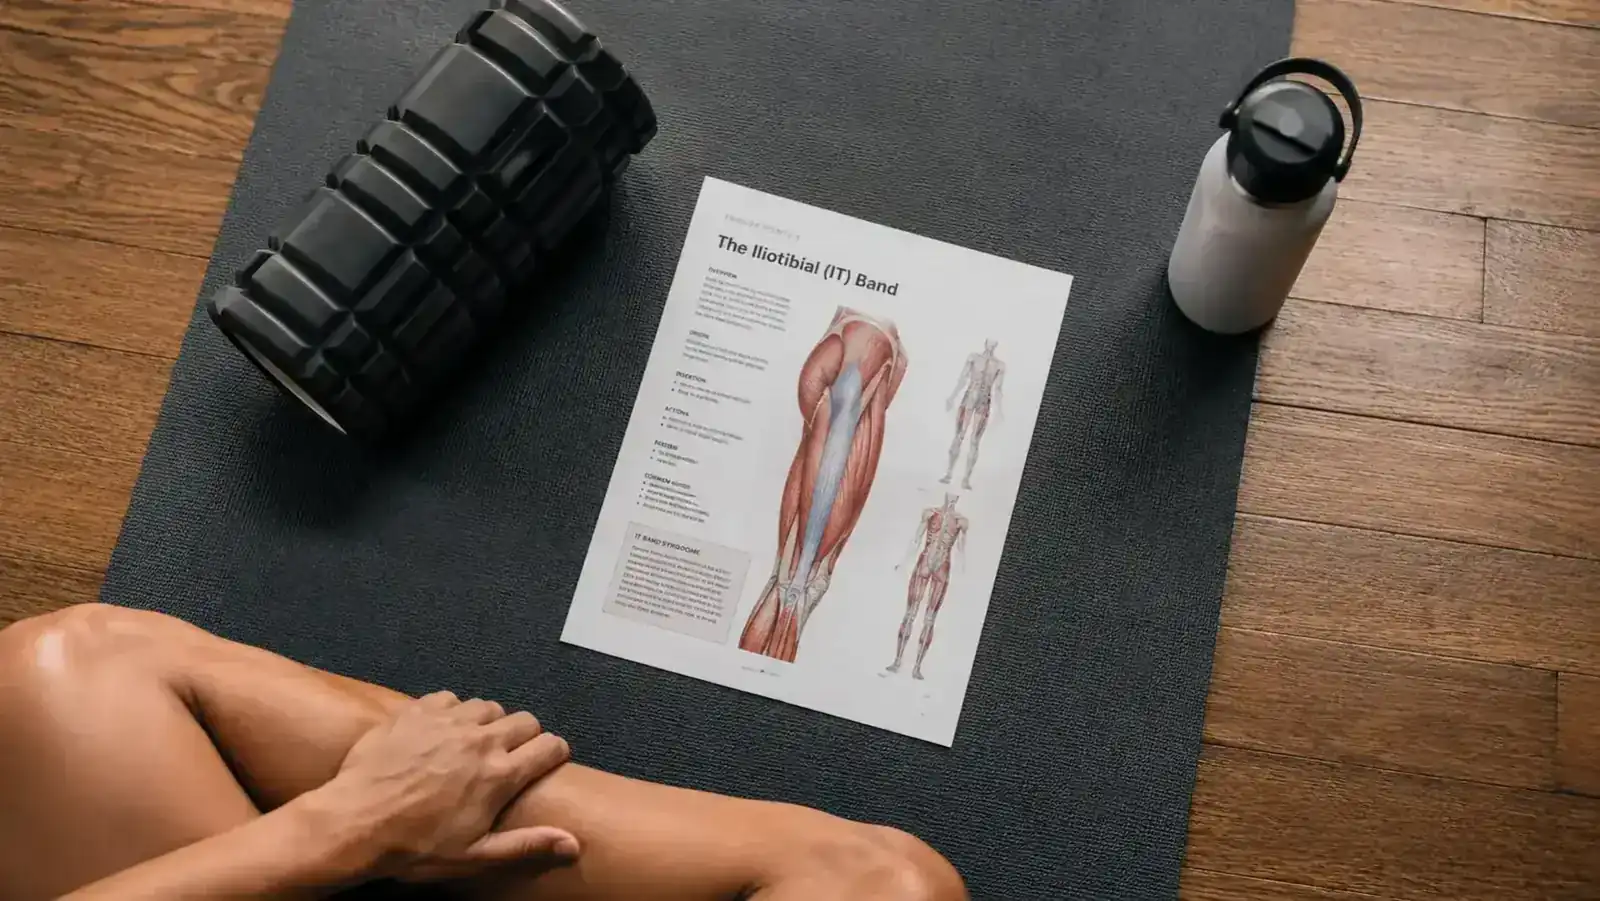
Here's a detail that changes how most people approach lateral hip and knee tightness: the iliotibial band is connective tissue, not contractile muscle. It doesn't shorten or lengthen the way a quad or glute does. When you lie on your side and grind a foam roller up and down the full length of your IT band, you're compressing something that doesn't release through compression. The discomfort is real, but it isn't indicating change in the tissue you think you're targeting.
The structures that actually create the tension you feel along the IT band are the TFL at the top of your hip, the gluteus maximus fibers that attach into it from behind, and the quads that run alongside it down the front of the thigh. When those muscles are short and loaded, they pull the IT band taut and shift your knee tracking. That's why rolling the TFL and glutes feels so productive and rolling the mid-band often just hurts without any lasting payoff. Work the muscles that feed the system, not the band itself.
Step 1: TFL Release (Outer Hip, Just Below the Iliac Crest)
Set the TriggerPoint GRID 2.0 on the floor and lie face-down at a slight angle, positioning the roller just below your hip bone on the outer side. Your body should be at roughly a 45-degree angle to the floor, not fully on your side. This places the roller on the TFL rather than on the IT band lower down. Place your hands on the floor in a modified plank position to control how much bodyweight you load through the roller.
Take slow breaths and make small forward-and-back rocking motions of about two inches. Do not roll rapidly up and down. When you find a spot that feels notably dense or tender, stop on it and hold gentle pressure for 20 to 30 seconds while breathing deliberately. That sustained hold tends to produce more noticeable release than frantic rolling. Work one side for 60 to 90 seconds before switching. The multi-density grid surface on the GRID 2.0 is particularly useful here because the firmer ridges create a more targeted feel on this small, dense muscle.
Do not push to the point of sharp pain. A dull, localized ache is normal. Anything radiating or sharp is a signal to back off the pressure by shifting more weight into your supporting arm.
Step 2: Glute and Piriformis Release
Sit on the roller with both hands on the floor behind you for support. Cross your right ankle over your left knee, creating a figure-four position. Tilt toward the right glute so the roller sits directly under the meaty part of that hip. The figure-four position opens up access to the deep glute and piriformis area, which is often the densest tissue on people who sit or train frequently.
Slowly shift your weight forward and back in small increments, and then side to side, exploring the whole gluteal region. As with Step 1, park on any spot that feels like a dense knot and hold for 20 to 30 seconds. Work each side for 90 seconds. People who run with tight hips or who squat regularly often find this is the spot where the most is happening. Releasing the glutes reduces the downstream pull on the IT band significantly.
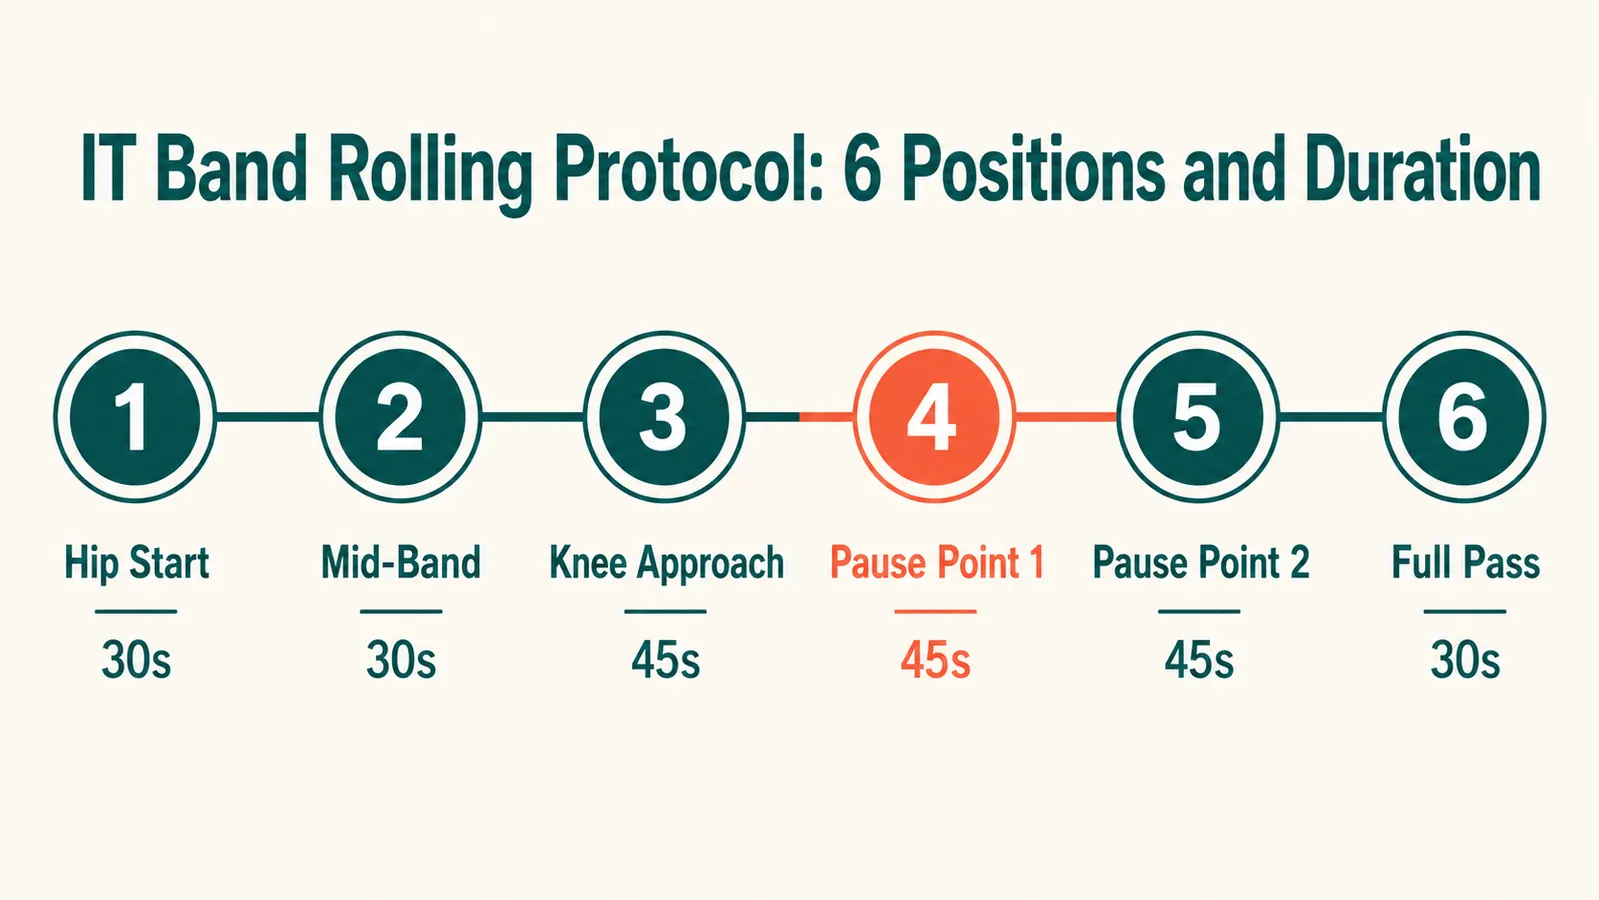
Step 3: Quad and Lateral Quad Release
Lie face-down with the roller positioned horizontally under your upper thighs, just above the knee. Keep your forearms on the floor, elbows stacked under your shoulders, to control your descent. Slowly walk your weight up onto the roller using your forearms, moving it from just above the knee toward the hip flexor crease at the top. This covers the rectus femoris, the vastus lateralis (the outer quad that connects closely with the IT band), and the soft tissue along the front of the thigh.
When you find a tender area, angle your body slightly outward to put more weight on the lateral quad specifically. Hold for 20 seconds, release, then continue moving. Rolling the lateral quad is one of the most effective ways to reduce the sensation of IT band tightness because the vastus lateralis and IT band share fascial continuity. Spend 90 seconds per side, working deliberately rather than rushing.
When you stop grinding on the IT band itself and start rolling the TFL, glutes, and lateral quad, the outer knee discomfort eases in a way that pure IT band rolling never produces.
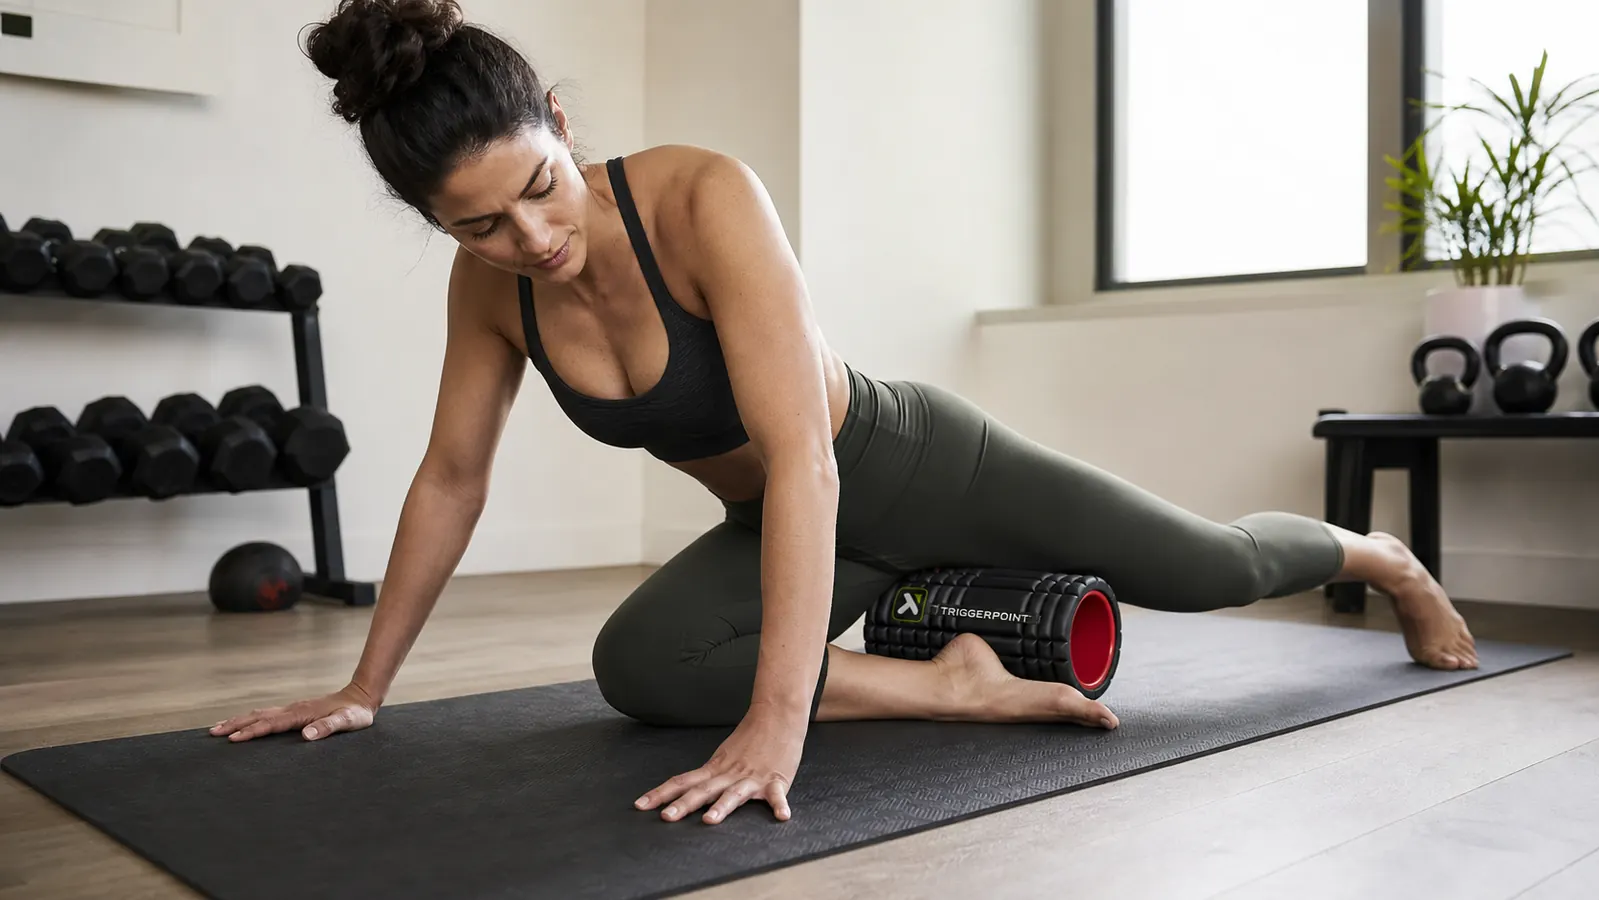
Step 4: Hip Flexor Release (Psoas and Iliacus Area)
Come into a half-kneeling position with your right knee on a folded mat behind you and your left foot forward. Position the roller lengthwise under your right hip flexor, at the front of the hip where the thigh meets the pelvis. Lower your hips slowly toward the floor until you feel the roller make contact with the upper quad and hip flexor region. This is a delicate area with important structures nearby, so start with lighter contact than in the glute or quad steps.
Gently rock forward until you feel a consistent engagement, then hold still and breathe. The hip flexors (primarily the psoas and iliacus) are chronically shortened in people who sit for long periods, which tilts the pelvis forward and loads the IT band from above. Even 60 seconds of held pressure on each side, three or four times per week, can produce a noticeable change in how your hip moves when you train. Do not roll aggressively here. This is a hold-and-breathe step, not a grinding step.
If you feel a pulse or any radiating sensation down the leg, shift your position slightly inward or outward. That sensation indicates you're near a vessel or nerve, and repositioning takes care of it immediately.
Step 5: Calf and Lateral Lower Leg (Optional Finisher)
This step is optional but worthwhile for runners and cyclists. Sit on the floor with the roller under your calves, hands on the floor behind you. Lift your hips slightly and shift your weight onto the roller, working slowly from the base of the calf up toward the back of the knee. Then tilt slightly outward to catch the outer lower leg and the peroneal muscles that run along the fibula. Tight peroneals and a tense posterior chain contribute to lateral knee stress in runners, so softening this tissue rounds out the protocol.
Cross one ankle over the other to increase pressure if the standard position feels too light. Spend 60 seconds per side. This is typically the most comfortable step in the sequence because the calf is more forgiving tissue than the glutes or TFL.
What Else Helps Alongside This Protocol
Foam rolling works best when it's part of a broader recovery and mobility approach. A few things that consistently improve outcomes when paired with this sequence: hip flexor stretching immediately after rolling while the tissue is receptive, particularly a kneeling hip flexor stretch held for 60 to 90 seconds per side. Strengthening the glutes through exercises like single-leg deadlifts and clamshells reduces the compressive demand on the IT band over time, since a stronger glute doesn't rely on the IT band to provide lateral stability. And adjusting training load when the tightness is severe enough to change your gait is always the right call. No rolling protocol replaces an appropriate rest or deload when overuse is the root issue.
The TriggerPoint GRID 2.0 earns its place in this protocol because the variable surface density genuinely changes what you can do with it. Smooth foam rollers can't modulate pressure across the different tissue densities you encounter in the TFL versus the quad versus the calf. The GRID's three-zone surface does. It's one of the reasons it's recommended by so many physical therapists and coaches as a first tool for anyone managing IT band or hip tightness. The 4.6-star rating across nearly 5,000 Amazon reviews reflects consistent experience across a wide range of training types.
Run this five-step protocol three to four times per week, either before training as part of a warm-up or in the evening as a standalone 15-minute recovery session. Most people notice improvement in hip mobility and a reduction in that familiar lateral tightness within two to three weeks of consistent use. The key is staying with the muscles that actually respond, working deliberately on each spot rather than rushing through, and giving the tissue time to adapt between sessions.
A roller that can't hold pressure on dense tissue can't finish this protocol
The TriggerPoint GRID 2.0 is built with a hollow core and multi-density foam that stays firm under bodyweight, even after months of daily use. It's the roller we come back to for TFL and hip flexor work consistently.
Amazon Check Today's Price on Amazon →